Getting started
This is the gentlest path into SvGrid Studio. By the end you will have a real, working Customers screen - a grid you can sort, filter, and page, with a create / edit form and delete - running on your machine. No prior experience with SvGrid is assumed.
If you would rather just click around first, open a live demo - no install needed:
- Data-app Studio - the whole stack in the browser
- Live SQL - a real Postgres in the browser (PGlite)
- Supabase - connect your own hosted Postgres
Two ways to build - pick yours
This is the visual designer - a screens list on the left, your data previewed live in the middle, and simple property panels on the right. You point, click, and press Generate:
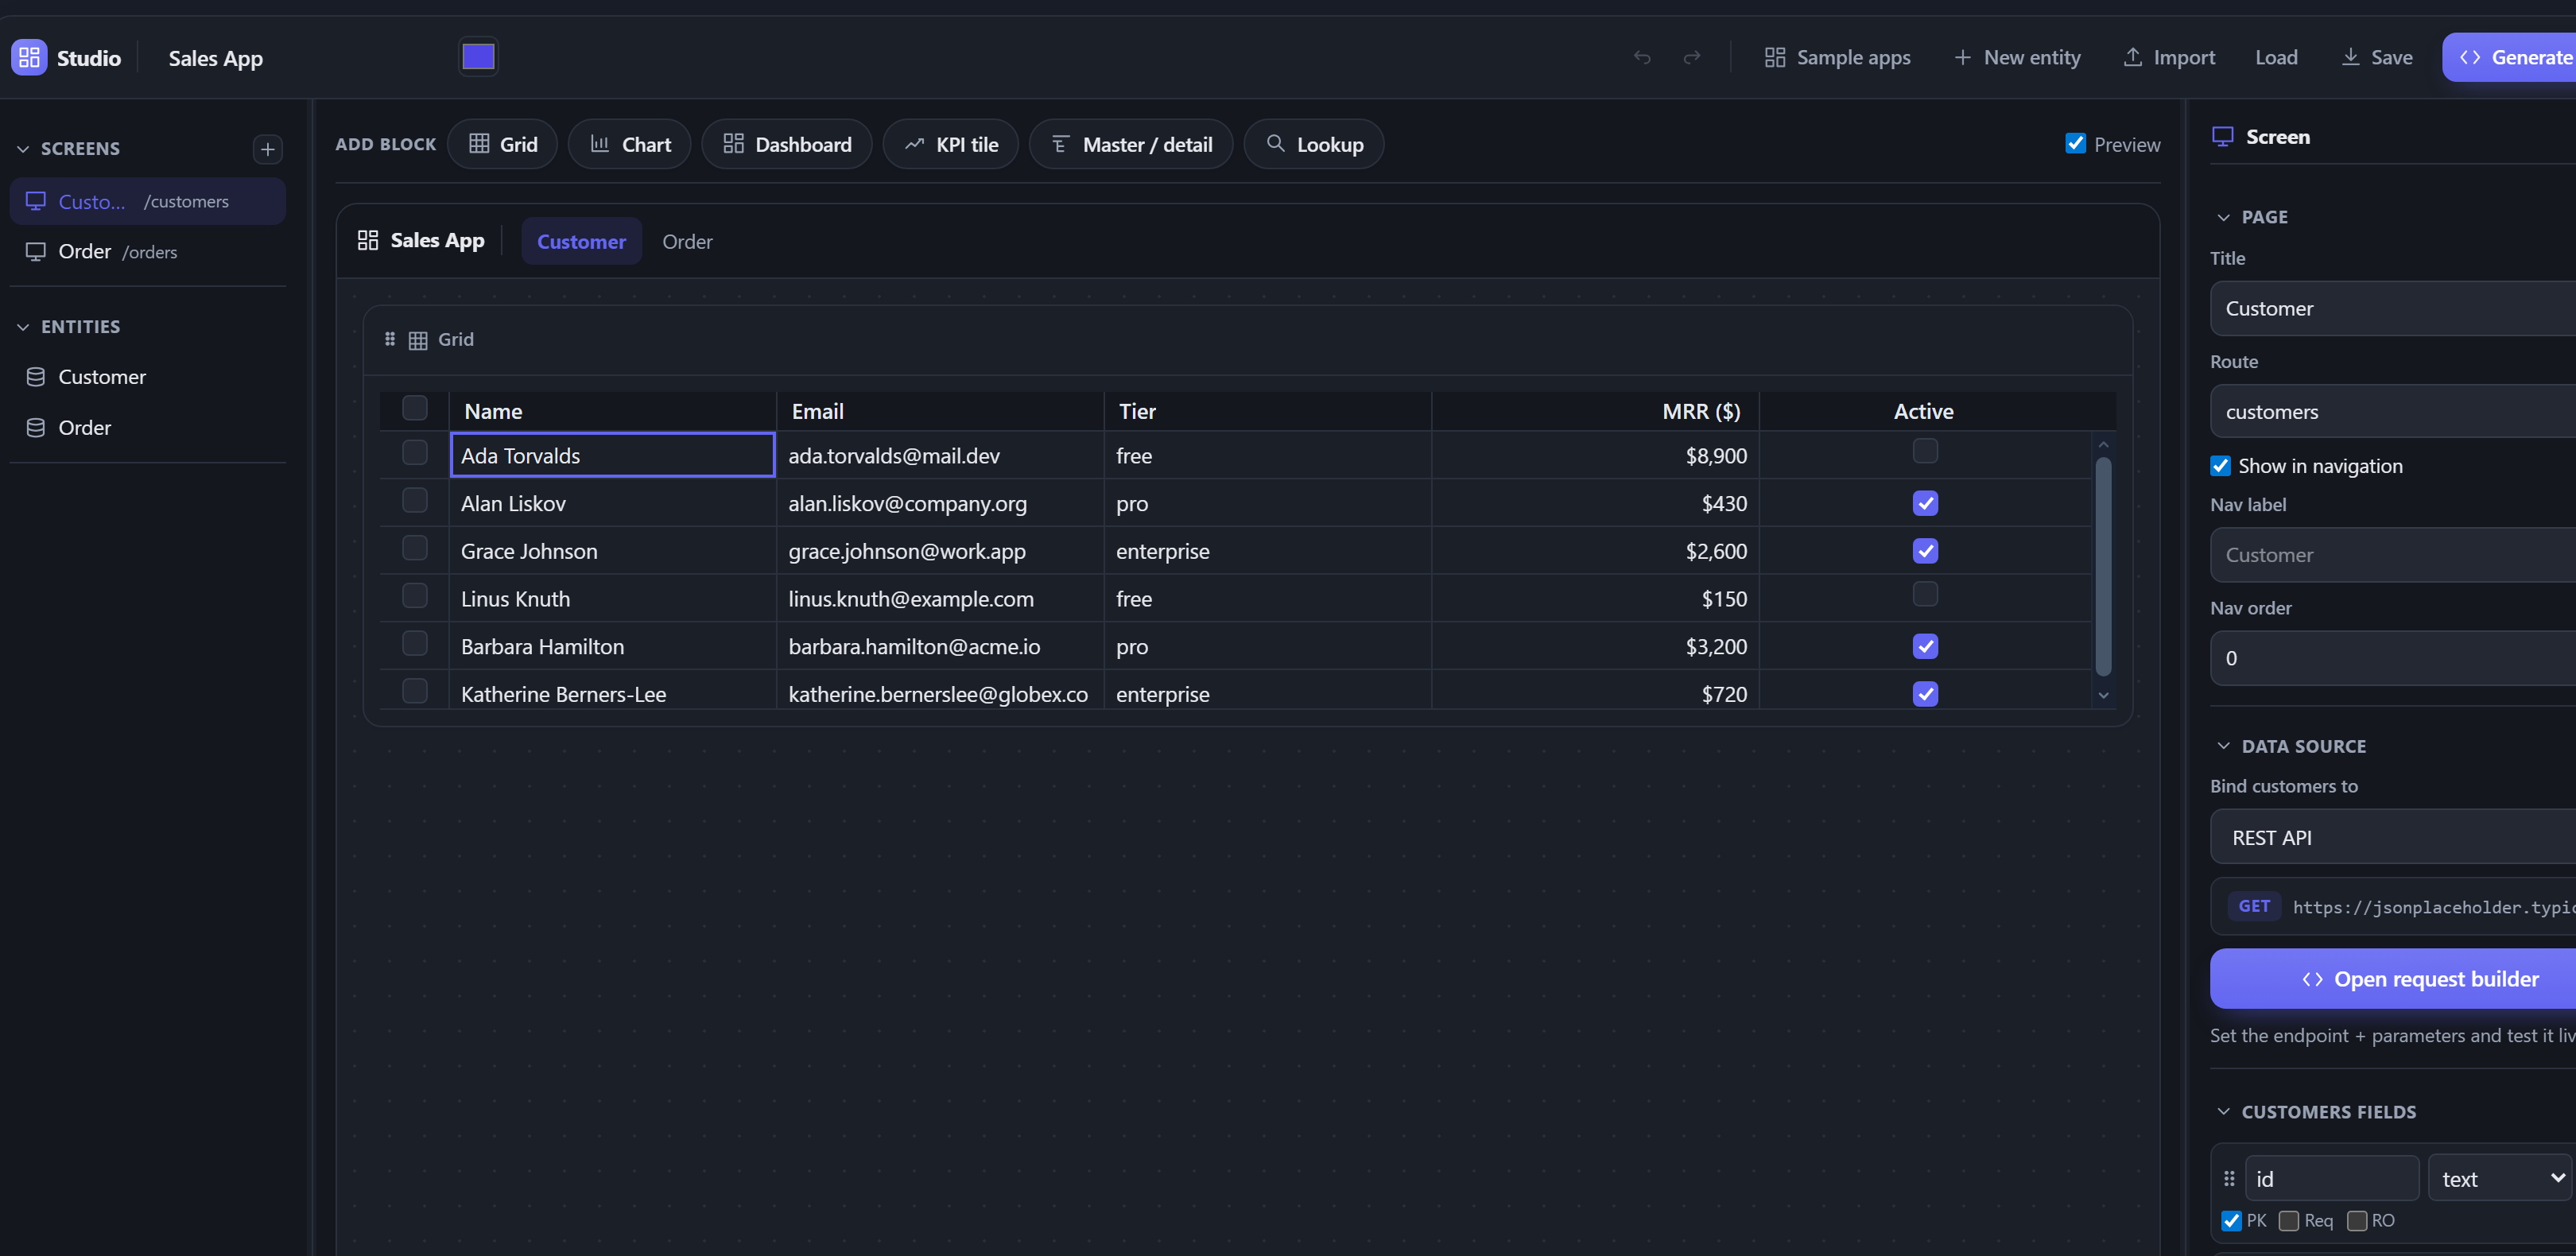
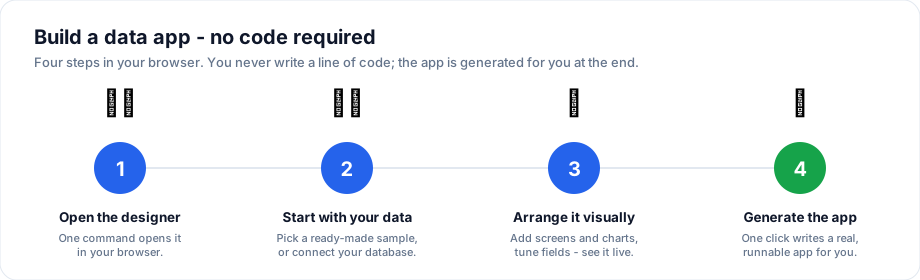
- No code (visual). You never write code - you point, click, and preview, then press one button to generate the finished app. If you are not a developer, or you just want it fast, start here: Build it visually. The sample apps let you open a complete, realistic app in one click and point it at your own data.
- With code. Prefer to work in an editor? Continue below - this page builds the same screen by hand so you can see exactly what Studio generates.
The two paths produce the same result; the visual designer just writes the code for you.
What you need
Node.js 18 or newer. Check with
node -vin a terminal. If that errors, install Node first.A terminal and a code editor (VS Code is fine).
A SvelteKit app. Don't have one? Create one in 30 seconds:
npx sv create my-app     # pick "SvelteKit minimal", TypeScript: yes
cd my-app
npm install
You do not need a database to start - the first screen below runs on in-memory data. You can point it at PostgreSQL, Supabase, MySQL, and others later without changing the UI.
Step 1 - Install
Inside your app folder:
npm i @svgrid/grid @svgrid/enterprise
@svgrid/gridis the grid itself.@svgrid/enterpriseadds Studio: the schema, the edit form, and the data-source helpers. It is soft-gate only - everything runs unlicensed, it just nudges. See licensing.
Step 2 - Describe your data once
Everything in Studio flows from one EntitySchema - a plain object that
lists your fields and their types. This single object drives the grid columns,
the edit form, and validation. Create src/lib/customers.ts:
import type { EntitySchema } from '@svgrid/enterprise'

export type Customer = {
  id: string
  name: string
  email: string
  tier: 'free' | 'pro' | 'enterprise'
  mrr: number
  active: boolean
}

export const customersSchema: EntitySchema<Customer> = {
  name: 'customers',
  label: 'Customer',
  idField: 'id',
  fields: [
    { field: 'id', type: 'text', primaryKey: true, readonly: true },
    { field: 'name', type: 'text', required: true, minLength: 2 },
    { field: 'email', type: 'text', label: 'Email', required: true, format: 'email' },
    { field: 'tier', type: 'enum', options: [
      { value: 'free', label: 'Free' },
      { value: 'pro', label: 'Pro' },
      { value: 'enterprise', label: 'Enterprise' },
    ] },
    { field: 'mrr', type: 'number', label: 'MRR ($)', min: 0 },
    { field: 'active', type: 'boolean' },
  ],
}
Every field option is explained in The EntitySchema.
Step 3 - Build the screen
Studio binds any data through one small contract, ServerDataSource
(read + create + update + delete). For a first run, createInMemoryDataSource
gives you that contract over a plain array - so the whole screen works before
you have a database. Create src/routes/customers/+page.svelte:
<script lang="ts">
  import { SvGrid, createServerDataSource, type ServerState } from '@svgrid/grid'
  import { SvGridEditPanel, createInMemoryDataSource, schemaToColumns } from '@svgrid/enterprise'
  import { customersSchema, type Customer } from '$lib/customers'

  const seed: Customer[] = [
    { id: 'c1', name: 'Ada Lovelace', email: '[email protected]', tier: 'enterprise', mrr: 1200, active: true },
    { id: 'c2', name: 'Alan Turing', email: '[email protected]', tier: 'pro', mrr: 240, active: true },
    { id: 'c3', name: 'Grace Hopper', email: '[email protected]', tier: 'enterprise', mrr: 980, active: true },
  ]

  const columns = schemaToColumns(customersSchema)
  const source = createInMemoryDataSource(seed, customersSchema)

  let view = $state<ServerState<Customer>>({
    rows: [], total: 0, loading: false, saving: false, error: null,
    pageIndex: 0, pageSize: 10, pageCount: 1, sortModel: [], filterModel: {},
  })
  let editing = $state<Customer | null | undefined>(undefined)
  let genId = 4

  const controller = createServerDataSource(source, {
    pageSize: 10, optimistic: true, getRowId: (r) => r.id,
    onChange: (s) => (view = s),
  })
  controller.refresh()

  async function save({ mode, id, values }) {
    if (mode === 'create') { await controller.createRow({ id: `c${genId++}`, ...values }); controller.setPage(view.pageCount - 1) }
    else if (id) { await controller.updateRow(id, values) }
    editing = undefined
  }
</script>

<button onclick={() => (editing = null)}>+ New customer</button>

<SvGrid
  data={view.rows} {columns} loading={view.loading}
  fitColumns enableRowSummaries={false}
  sortable externalSort onSortingChange={(s) => controller.setSort(s)}
  filterable filterMode="row" externalFilter
  onFiltersChange={(f) => controller.setFilter({
    global: f.global || undefined,
    columns: Object.fromEntries(f.columns.map((c) => [c.id, { operator: c.operator, value: c.value, valueTo: c.valueTo, selectedValues: c.selectedValues }])),
  })}
  onRowClick={(e) => (editing = e.row)}
  showPagination externalPagination
  rowCount={view.total} pageIndex={view.pageIndex} pageSize={view.pageSize}
  onPaginationChange={({ pageIndex, pageSize }) => pageSize !== view.pageSize ? controller.setPageSize(pageSize) : controller.setPage(pageIndex)}
/>

{#if editing !== undefined}
  <SvGridEditPanel schema={customersSchema} row={editing} presentation="modal"
    onSubmit={save} onCancel={() => (editing = undefined)} />
{/if}
Step 4 - Run it
npm run dev
Open the URL it prints (usually http://localhost:5173) and go to
/customers. You now have a working screen:
- Click a column header to sort.
- Type in the filter row under a header to filter (it stays focused as you type).
- Click + New customer to create; click a row to edit. The form validates as you type - try an invalid email.
- Page through with the native pager at the bottom.
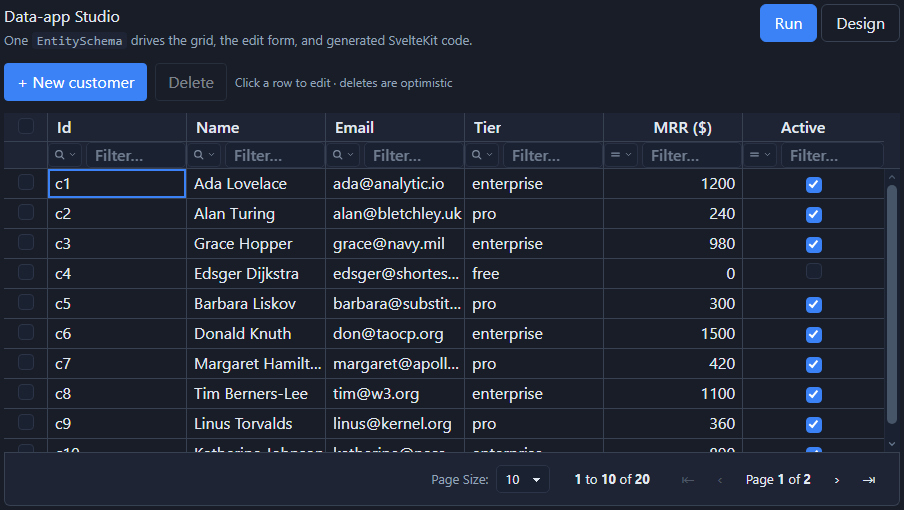
Step 5 - Change something
Because the schema drives everything, changes are one edit. Add a field to
customers.ts:
{ field: 'country', type: 'text', label: 'Country' },
Save. The grid gets a Country column and the edit form gets a Country input - no other change. That is the payoff of the single schema.
Where to go next
You have the whole shape now. The usual next steps:
- Connect a real database - swap
createInMemoryDataSourcefor a SQL or Supabase source; the page above does not change. For Supabase, follow the complete one-page Supabase CRUD grid tutorial, or see Databases for SQL. - Skip the boilerplate -
npx @svgrid/studio add customers --db postgres --url ...generates all of the above (schema + API route + page) from a live table. See The Studio CLI. - Design visually - author the schema in a UI with live preview and click Generate code. See Visual designer.
- Build a full app - the Build a CRM tutorial wires up companies, contacts, and deals with relations and master-detail.
See also
- SvGrid Studio overview
- Data binding - the
ServerDataSourcecontract in depth - Edit forms & validation
- Troubleshooting & FAQ