Launch the designer
One command opens the visual app designer in your browser, backed by a tiny local server that auto-saves your design to disk and generates the app into a folder - no host app to build, no copy-paste JSON.
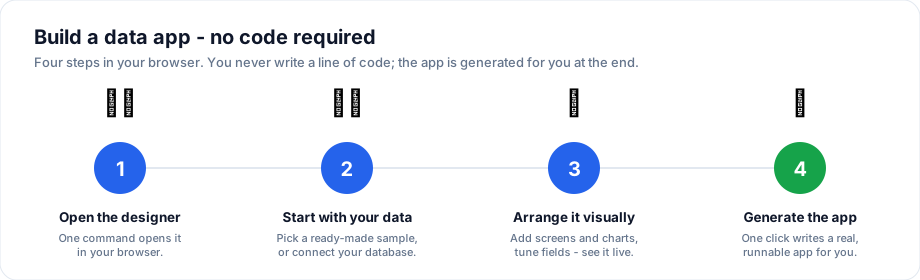
You run one command to open the designer; everything after that is point-and-click - no coding.
npx @svgrid/studio designer
That serves the designer at http://localhost:4321 and opens it. Design your
app - screens, entities, data sources, grid config - and every edit is saved to
studio.config.json in the current folder as you work. A refresh (or a rerun)
picks up exactly where you left off.
What it does
- Loads
studio.config.jsonfrom the current folder. If there's none yet, the designer opens with a small starter project so you have something to edit. - Auto-saves every change back to
studio.config.json(debounced). This is the persistence the embedded component never had - your work survives a refresh. - Generates the app to disk: open Generate app, then click Save to
folder. Every file of the runnable SvelteKit + Vite project is written into
the output folder (the driver deps for any SQL / Supabase entity are added to
its
package.jsonfor you). Download .zip is still there too.
cd my-app                 # design saved here as studio.config.json
npx @svgrid/studio designer
# ... design, then Generate app -> Save to folder ...
npm install
npm run dev
Start from zero
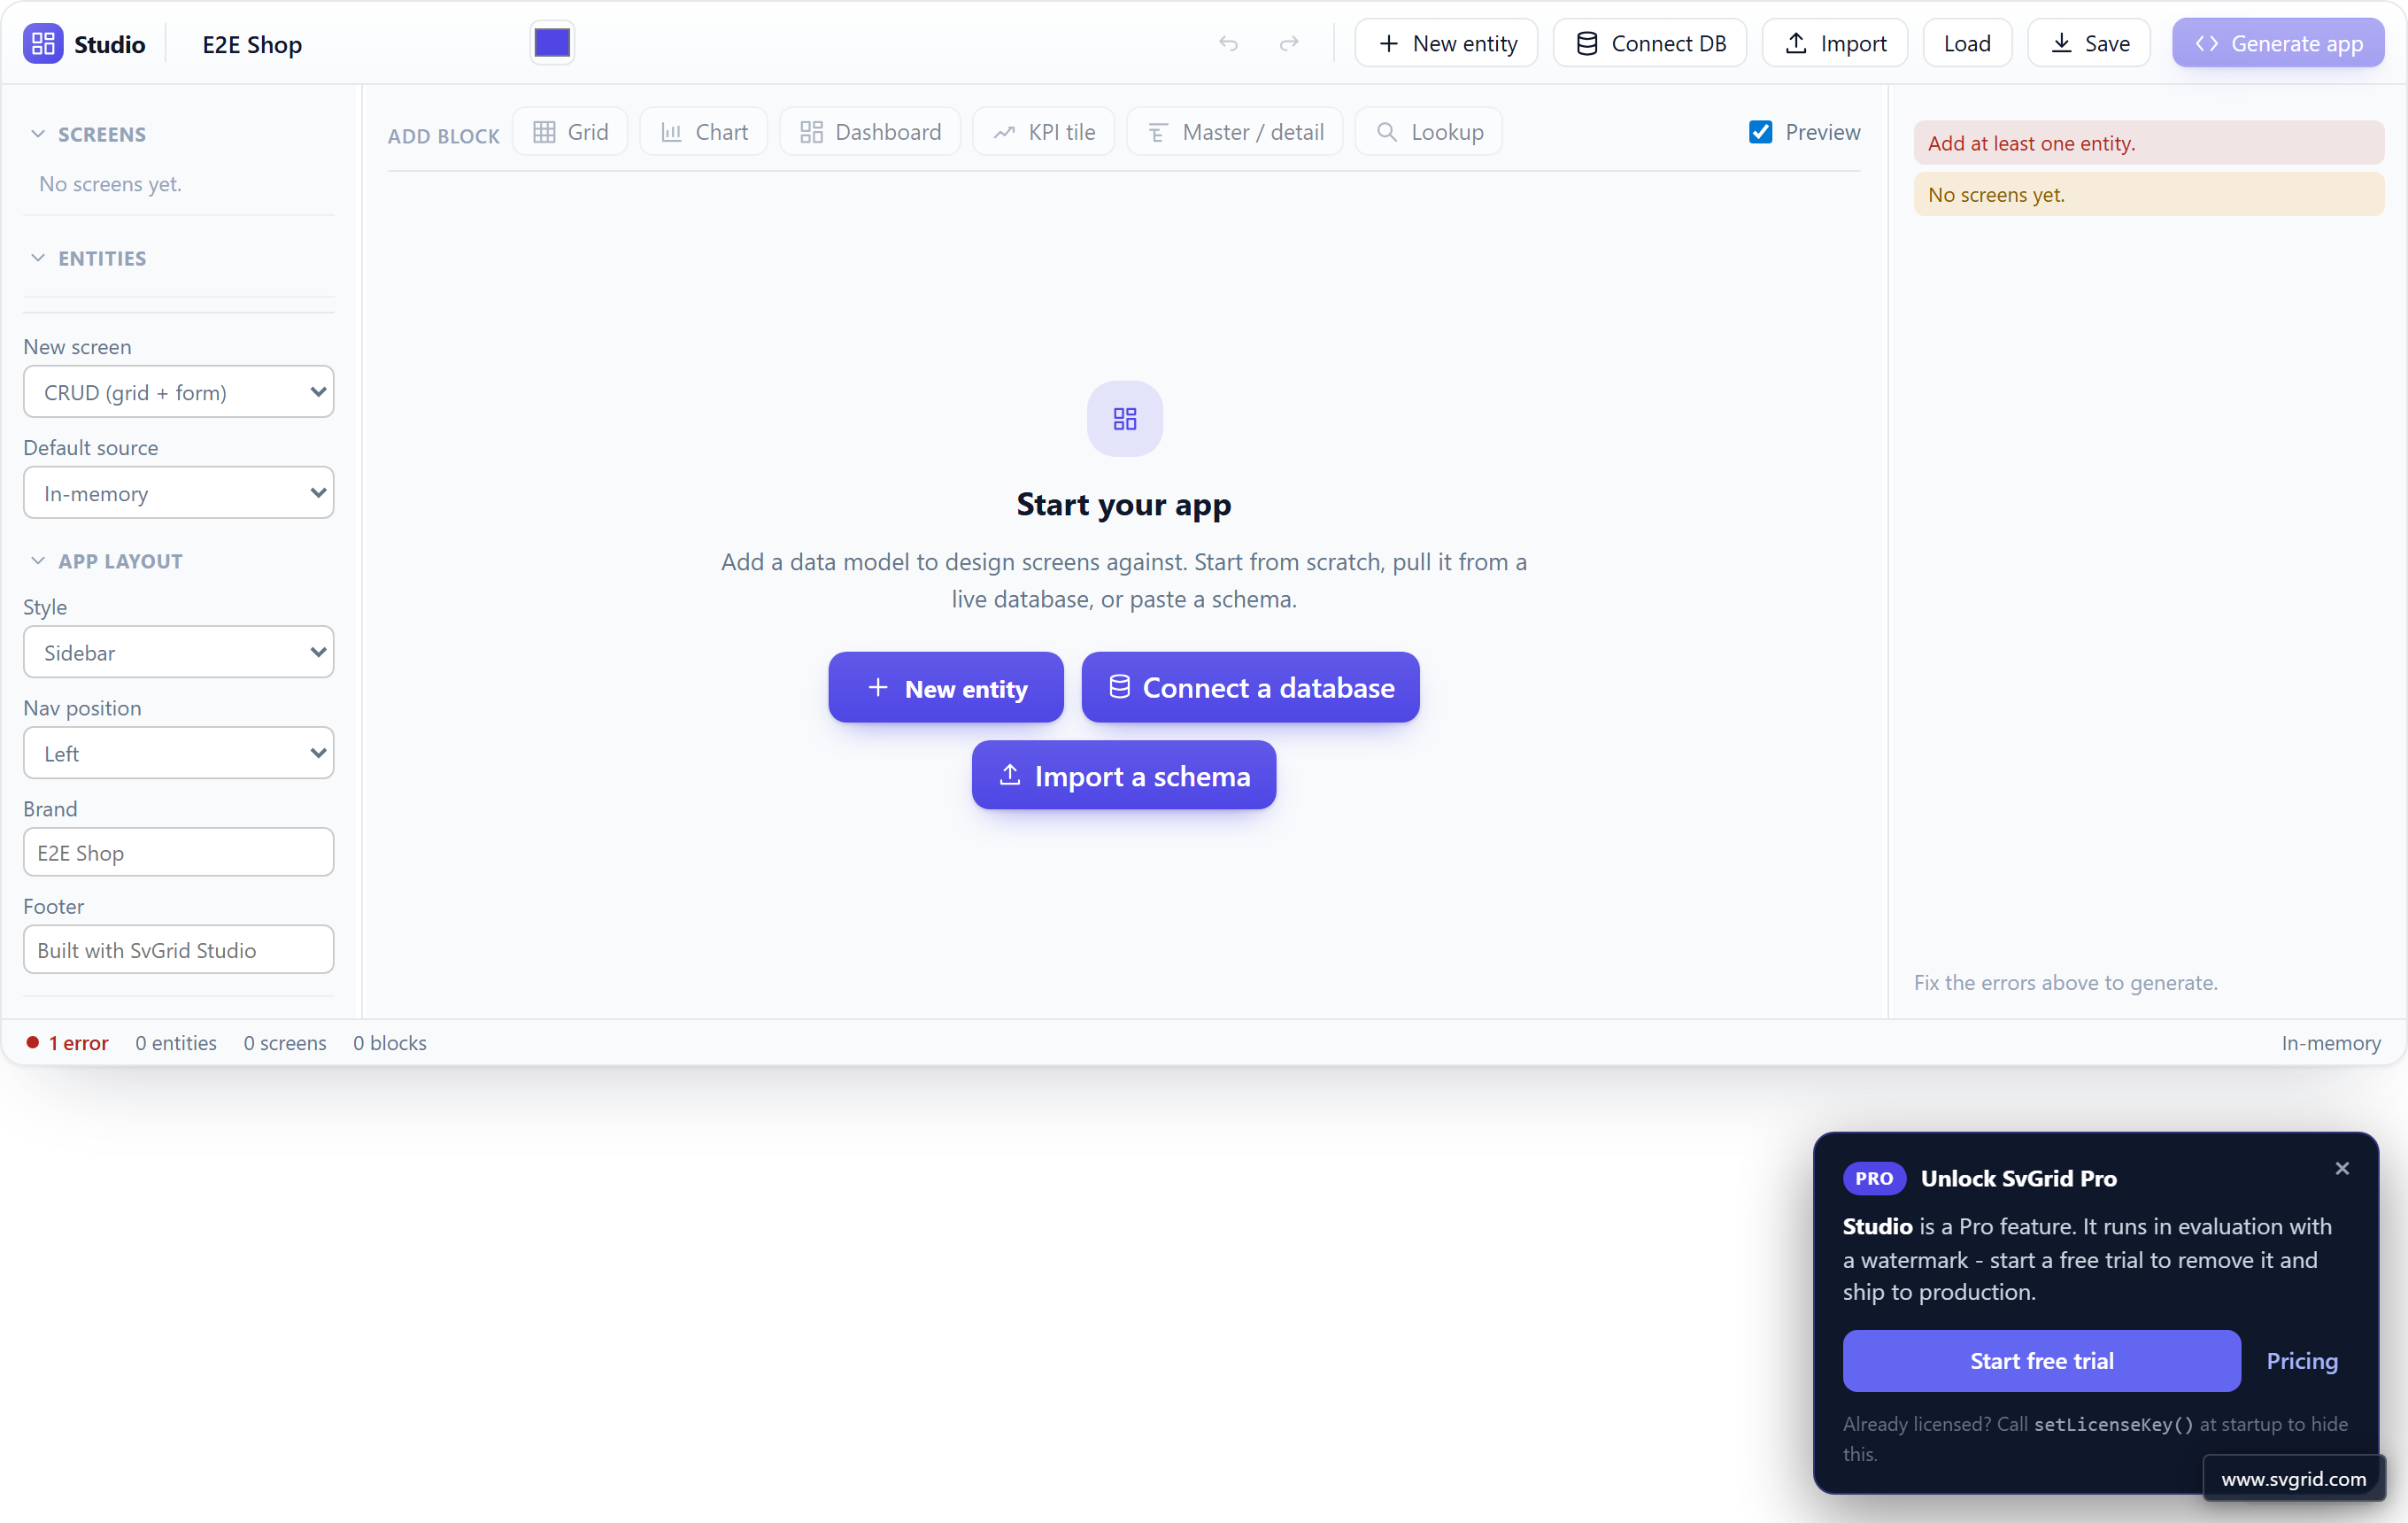
Launched in an empty folder, the designer opens on an onboarding screen -
your app has no data model yet. The quickest start is a ready-made
sample app (--template <id>, or the Sample apps button);
otherwise add a data model one of these ways:
- New entity - name it and get a screen with an
id+namefield; flesh out the rest (fields, types, PK / required / relations) in the inspector. The New entity button in the toolbar works any time, not just at the start. - Connect a database - see below.
- Import a schema - paste a Drizzle
schema.tsor Prismaschema.prisma.
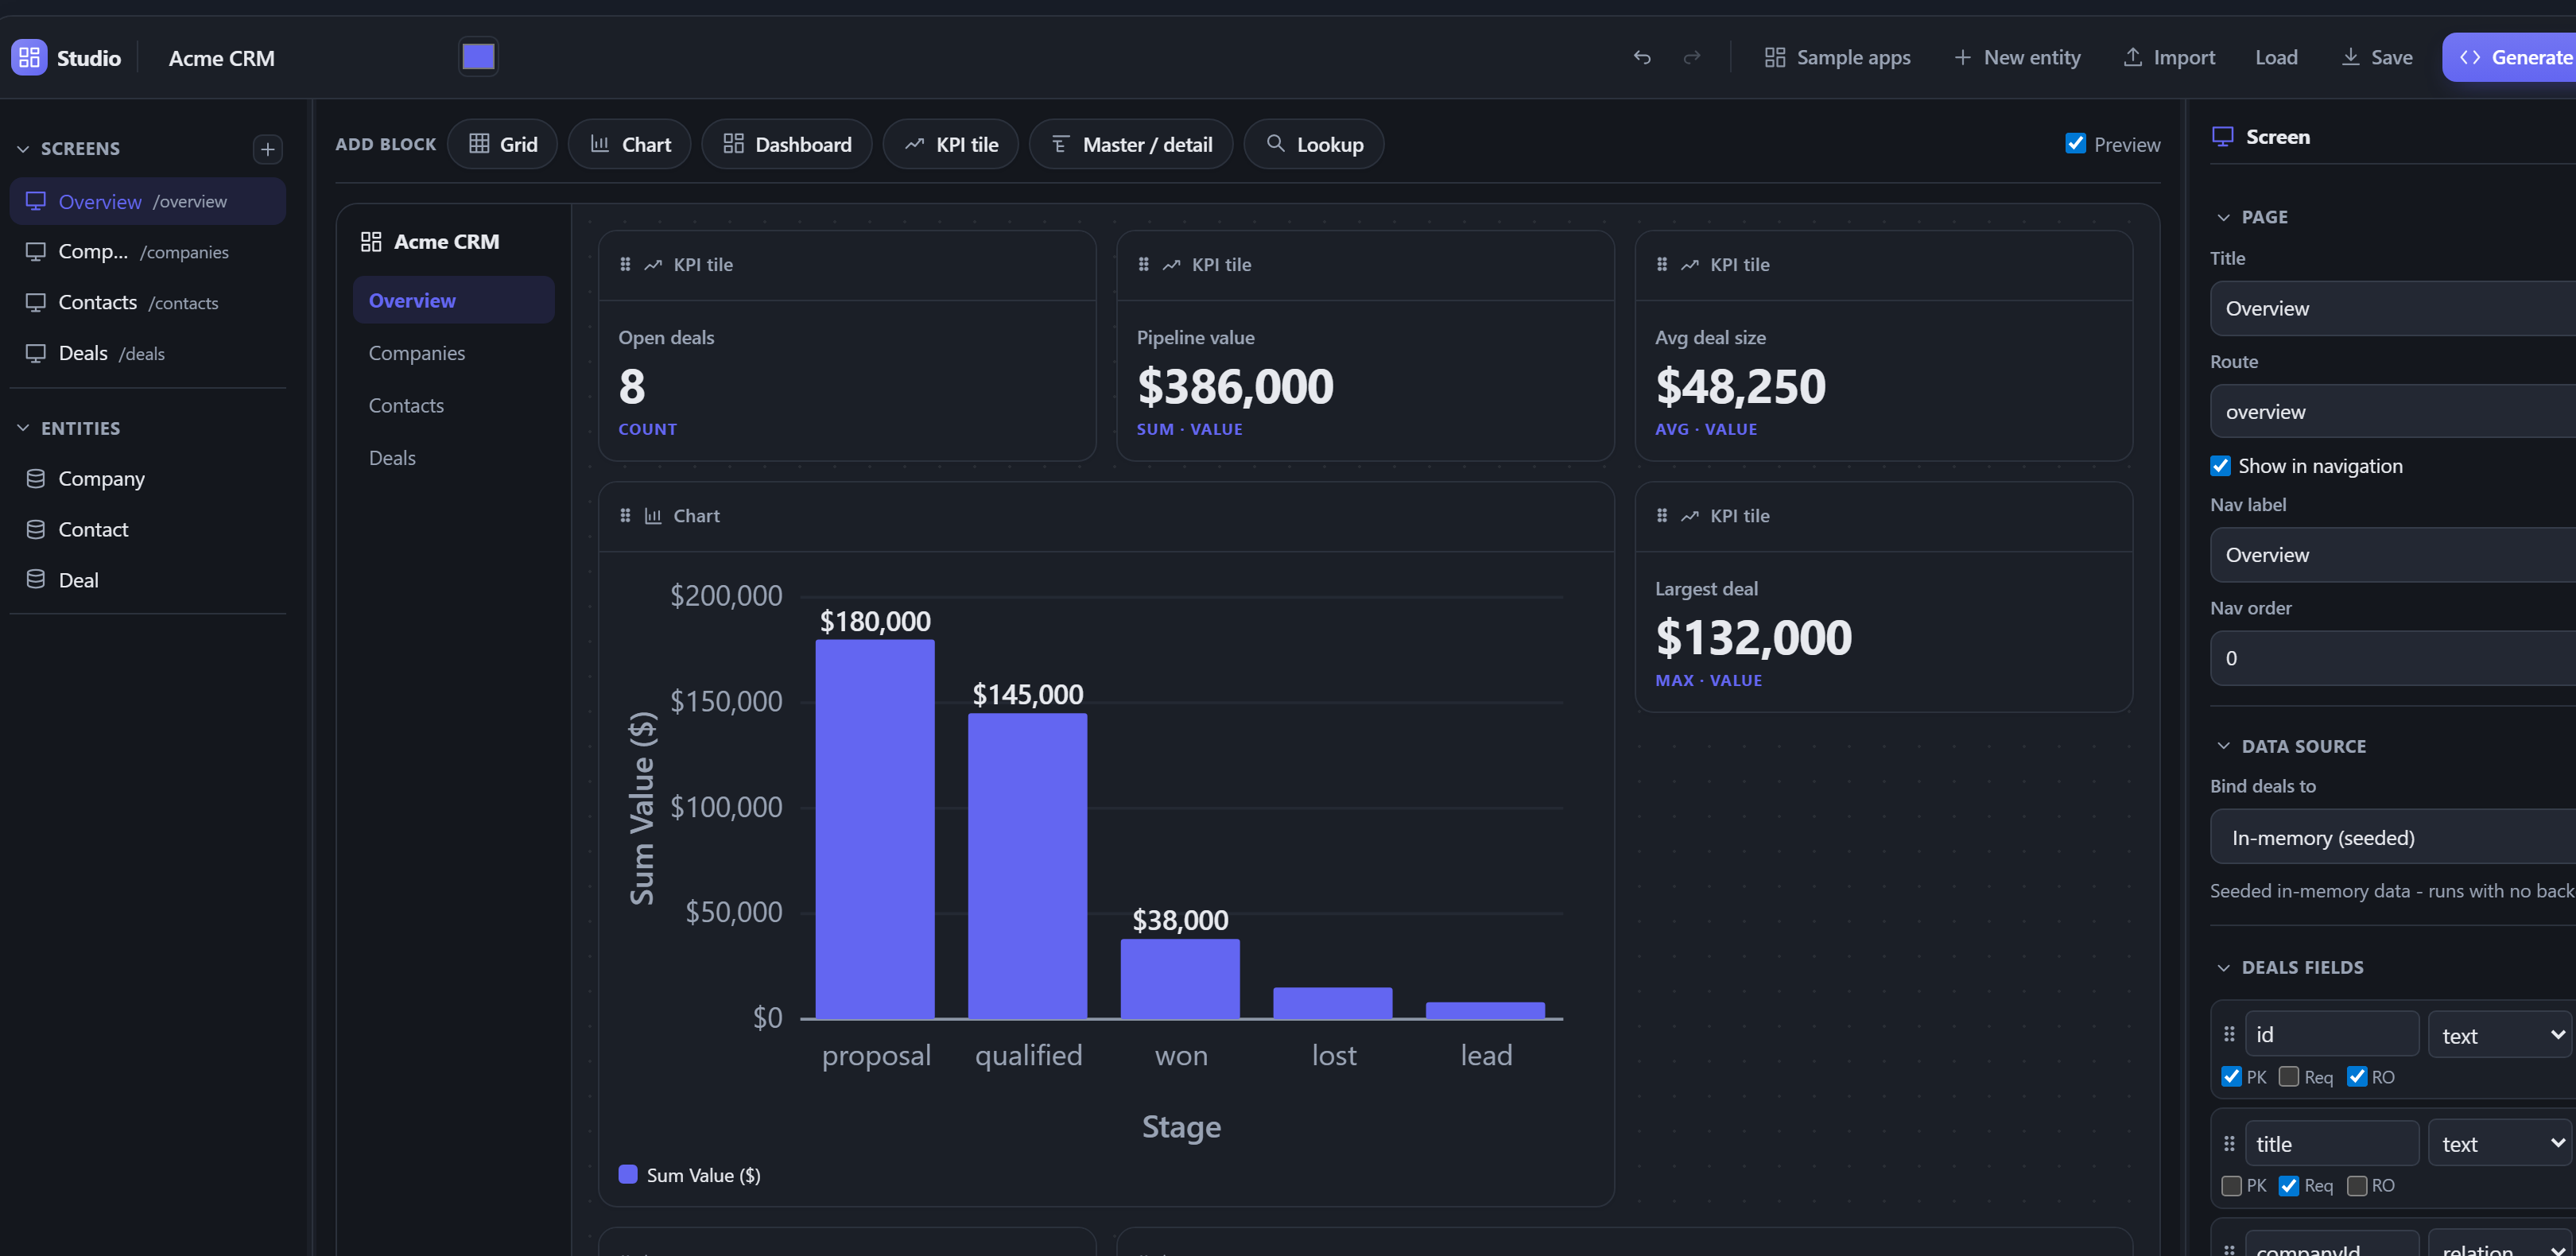
Opening a sample app gives you a complete, themed app in one click. Here the CRM sample - a dashboard with KPI tiles and a deal-pipeline chart, ready to explore or point at your own data:
Connect a live database
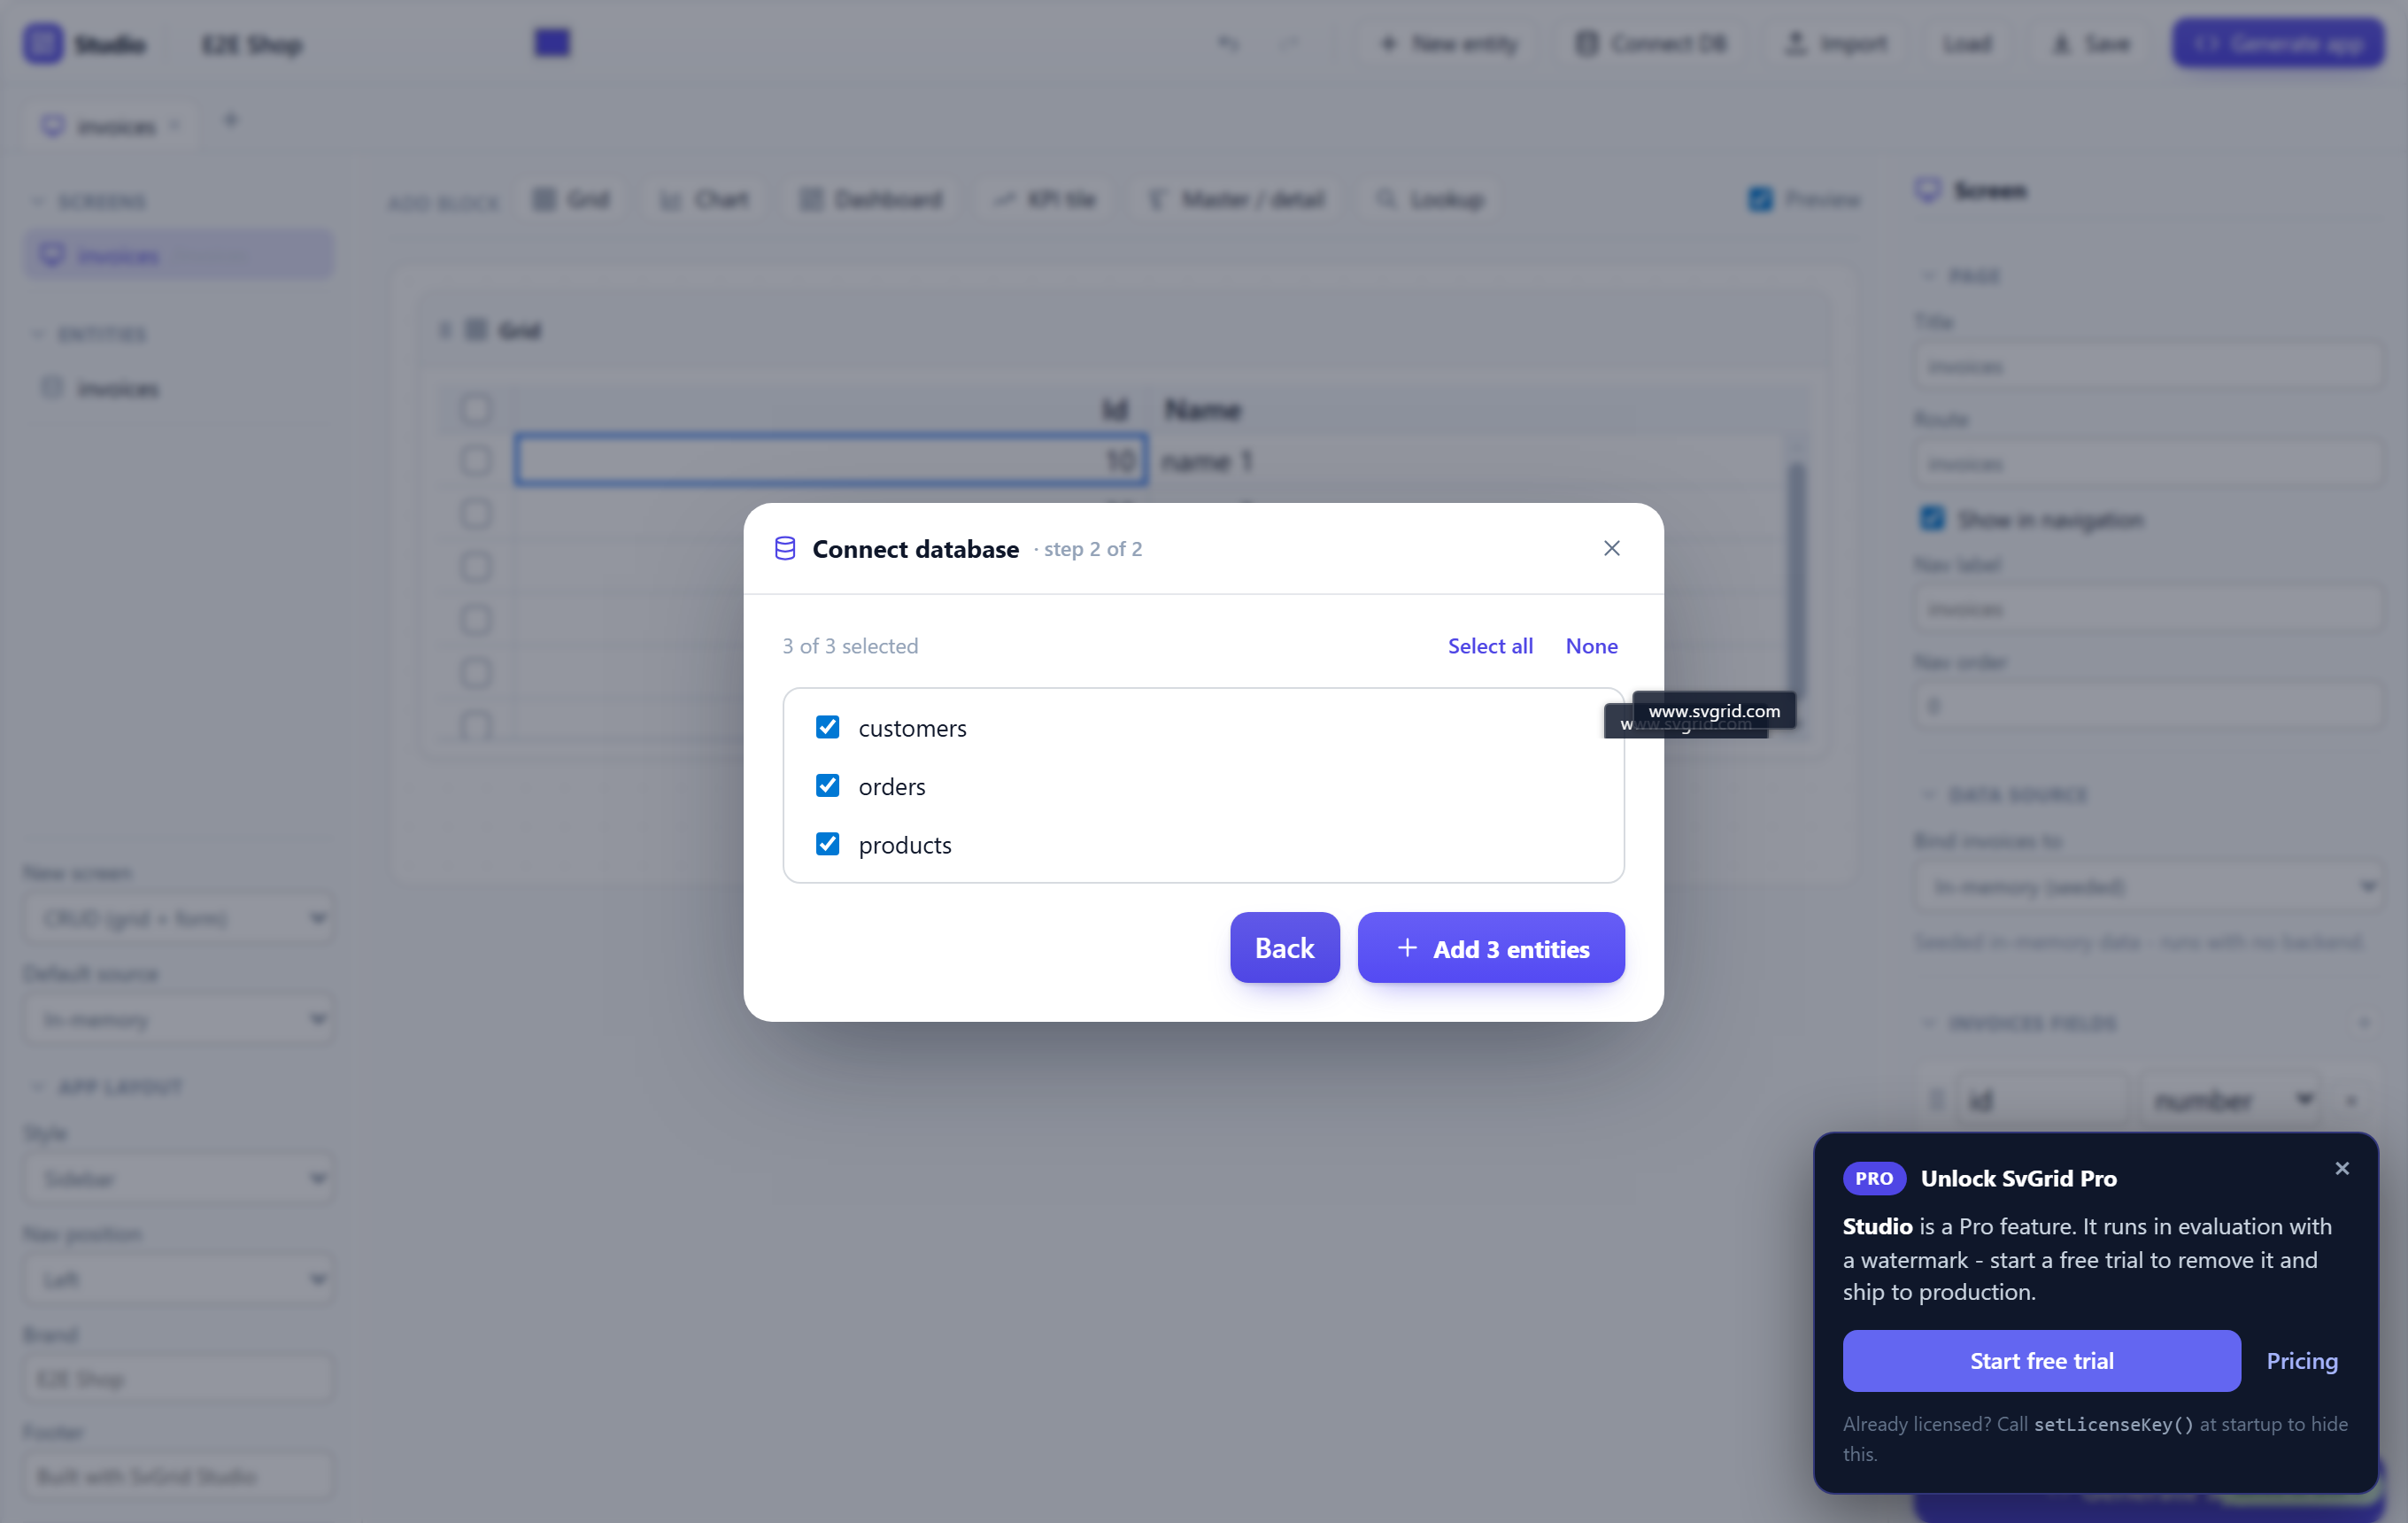
Connect DB (toolbar) opens a wizard that reads your database and turns its tables into entities - no hand-typing a schema:
- Pick the database (PostgreSQL / MySQL / SQL Server / SQLite / Supabase) and paste a connection string.
- The designer lists the tables; tick the ones you want.
- Add them - each becomes an entity + screen, with columns typed from the
catalog and foreign keys turned into relations. Every added entity is
bound to its SQL table, so Generate app emits a connected
src/routes/api/<table>/+server.ts(driver +DATABASE_URL) for it.
The database driver (pg / mysql2 / mssql / better-sqlite3) must be
installed in the folder you launched the designer in. The connection stays on
your machine - the local designer server does the read; nothing is sent to a
cloud. To scaffold from a schema file or a live DB straight from the terminal
instead, use npx @svgrid/studio add.
Options
| Flag | Default | Description |
|---|---|---|
--config <path> |
./studio.config.json |
The design file to load + auto-save. |
--out <dir> |
. |
Folder the generated app is written into (Save to folder). |
--port <n> |
4321 |
Port to serve on. |
--no-open |
- | Don't open the browser (print the URL only). |
# keep the design and the generated app in separate folders
npx @svgrid/studio designer --config ./design/app.json --out ./generated-app
How it fits together
The design is a StudioProject (the same model the app designer
edits and the CLI can regenerate from). studio.config.json is that
model on disk, so the designer, npx @svgrid/studio designer, and
npm create @svgrid/studio -- --project ./studio.config.json all read and write
the one file - design visually, regenerate from CI, or hand it to a teammate.
See also
- Visual app designer - the canvas, blocks, and grid property editor
- The Studio CLI -
adda screen from a schema or a live database - Getting started - the full first-app walkthrough