Tutorial: a Supabase CRUD grid
This is the one page that does it all: create a data grid, connect it to a Supabase database, and get full create / read / update / delete - sorting, filtering, search, and paging included. Everything is here; copy the four files and run.
Try it first, no install: the Supabase demo is exactly this - paste your project URL + anon key and it runs against your real database in the browser.
You need a SvelteKit app (npx sv create my-app)
and a free Supabase account. About ten minutes end to end.
Step 1 - Create the table in Supabase
In the Supabase dashboard, open SQL Editor, paste this, and click Run. It
creates a customers table, seeds a few rows, and - crucially - opens read/write
access with a Row-Level Security policy (Supabase blocks everything until you do):
create table if not exists customers (
  id     bigint generated always as identity primary key,
  name   text not null,
  email  text not null,
  tier   text,
  mrr    integer,
  active boolean default true
);

insert into customers (name, email, tier, mrr, active) values
  ('Ada Lovelace',    '[email protected]',      'enterprise', 1200, true),
  ('Alan Turing',     '[email protected]',    'pro',         240, true),
  ('Grace Hopper',    '[email protected]',       'enterprise',  980, true);

-- Demo access. For a real app, scope this to authenticated users - see below.
alter table customers enable row level security;
create policy "svgrid demo access" on customers for all to anon using (true) with check (true);
Then get your keys from Project Settings -> API: the Project URL
(https://xxxx.supabase.co) and the anon public key (eyJ...). The anon key
is safe in the browser; RLS is what actually protects the data, so keep it on.
Full detail and options are in the Supabase reference.
For production, do not grant blanket
anonaccess. Add auser_idcolumn and scope rows to the signed-in user (using (auth.uid() = user_id)), then put the screen behind a login - see Auth & secured screens.
Step 2 - Install
Inside your SvelteKit app:
npm i @svgrid/grid @svgrid/enterprise @supabase/supabase-js
Put your keys in .env (Vite exposes PUBLIC_-prefixed vars to the browser):
PUBLIC_SUPABASE_URL="https://xxxx.supabase.co"
PUBLIC_SUPABASE_ANON_KEY="eyJhbGciOiJI..."
Step 3 - Describe the table once
One EntitySchema drives the grid columns, the edit form, and validation. Create
src/lib/customers.ts:
import type { EntitySchema } from '@svgrid/enterprise'

export type Customer = {
  id: number
  name: string
  email: string
  tier: 'free' | 'pro' | 'enterprise'
  mrr: number
  active: boolean
}

export const customersSchema: EntitySchema<Customer> = {
  name: 'customers',
  label: 'Customer',
  idField: 'id',
  fields: [
    { field: 'id', type: 'number', primaryKey: true, readonly: true },
    { field: 'name', type: 'text', required: true, minLength: 2 },
    { field: 'email', type: 'text', label: 'Email', required: true, format: 'email' },
    { field: 'tier', type: 'enum', options: [
      { value: 'free', label: 'Free' },
      { value: 'pro', label: 'Pro' },
      { value: 'enterprise', label: 'Enterprise' },
    ] },
    { field: 'mrr', type: 'number', label: 'MRR ($)', min: 0 },
    { field: 'active', type: 'boolean' },
  ],
}
Step 4 - Connect the grid to Supabase
createSupabaseDataSource maps the grid's sort, filter, paging, and CRUD onto the
Supabase query builder. This is the only Supabase-specific code. Create
src/lib/customers.source.ts:
import { createClient } from '@supabase/supabase-js'
import { PUBLIC_SUPABASE_URL, PUBLIC_SUPABASE_ANON_KEY } from '$env/static/public'
import { createSupabaseDataSource } from '@svgrid/enterprise'
import { customersSchema, type Customer } from '$lib/customers'

const client = createClient(PUBLIC_SUPABASE_URL, PUBLIC_SUPABASE_ANON_KEY)

export const customersSource = createSupabaseDataSource<Customer>({
  client,
  table: 'customers',
  schema: customersSchema,
  // searchColumns: ['name', 'email'],  // optional; defaults to text + enum fields
})
That is the whole data layer. Because it implements the same
ServerDataSource contract as every other backend, the page
below would work unchanged over SQL, REST, or in-memory data - only this file
changes.
Step 5 - The grid + CRUD page
The complete screen. Create src/routes/customers/+page.svelte:
<script lang="ts">
  import { SvGrid, createServerDataSource, type ServerState } from '@svgrid/grid'
  import { SvGridEditPanel, schemaToColumns } from '@svgrid/enterprise'
  import { customersSchema, type Customer } from '$lib/customers'
  import { customersSource } from '$lib/customers.source'

  const columns = schemaToColumns(customersSchema)

  let view = $state<ServerState<Customer>>({
    rows: [], total: 0, loading: false, saving: false, error: null,
    pageIndex: 0, pageSize: 10, pageCount: 1, sortModel: [], filterModel: {},
  })
  // undefined = panel closed; null = creating; a row = editing that row
  let editing = $state<Customer | null | undefined>(undefined)

  const controller = createServerDataSource(customersSource, {
    pageSize: 10,
    optimistic: true,               // create/update/delete apply instantly, roll back on error
    getRowId: (r) => String(r.id),
    onChange: (s) => (view = s),
  })
  controller.refresh()

  async function save({ mode, id, values }) {
    if (mode === 'create') await controller.createRow(values)   // Supabase assigns the id
    else if (id != null) await controller.updateRow(String(id), values)
    editing = undefined
  }

  let selectedRows = $state<Customer[]>([])
  async function removeSelected() {
    for (const row of selectedRows) await controller.deleteRow(String(row.id))
    selectedRows = []
  }
</script>

<div style="display:flex; gap:8px; margin-bottom:8px;">
  <button onclick={() => (editing = null)}>+ New customer</button>
  <button disabled={selectedRows.length === 0} onclick={removeSelected}>Delete selected</button>
</div>

<SvGrid
  data={view.rows} {columns} loading={view.loading}
  fitColumns enableRowSummaries={false}

  selectionMode="row"
  onRowSelectionChange={(_, rows) => (selectedRows = rows)}

  sortable externalSort onSortingChange={(s) => controller.setSort(s)}

  filterable filterMode="row" showGlobalFilter externalFilter
  onFiltersChange={(f) => controller.setFilter({
    global: f.global || undefined,
    columns: Object.fromEntries(
      f.columns.map((c) => [c.id, { operator: c.operator, value: c.value, valueTo: c.valueTo, selectedValues: c.selectedValues }]),
    ),
  })}

  onRowClick={(e) => (editing = e.row)}

  showPagination externalPagination
  rowCount={view.total} pageIndex={view.pageIndex} pageSize={view.pageSize}
  onPaginationChange={({ pageIndex, pageSize }) =>
    pageSize !== view.pageSize ? controller.setPageSize(pageSize) : controller.setPage(pageIndex)}
/>

{#if editing !== undefined}
  <SvGridEditPanel
    schema={customersSchema}
    row={editing}
    presentation="modal"
    onSubmit={save}
    onCancel={() => (editing = undefined)}
  />
{/if}
Step 6 - Run it
npm run dev
Open /customers. You now have a live, Supabase-backed CRUD grid:
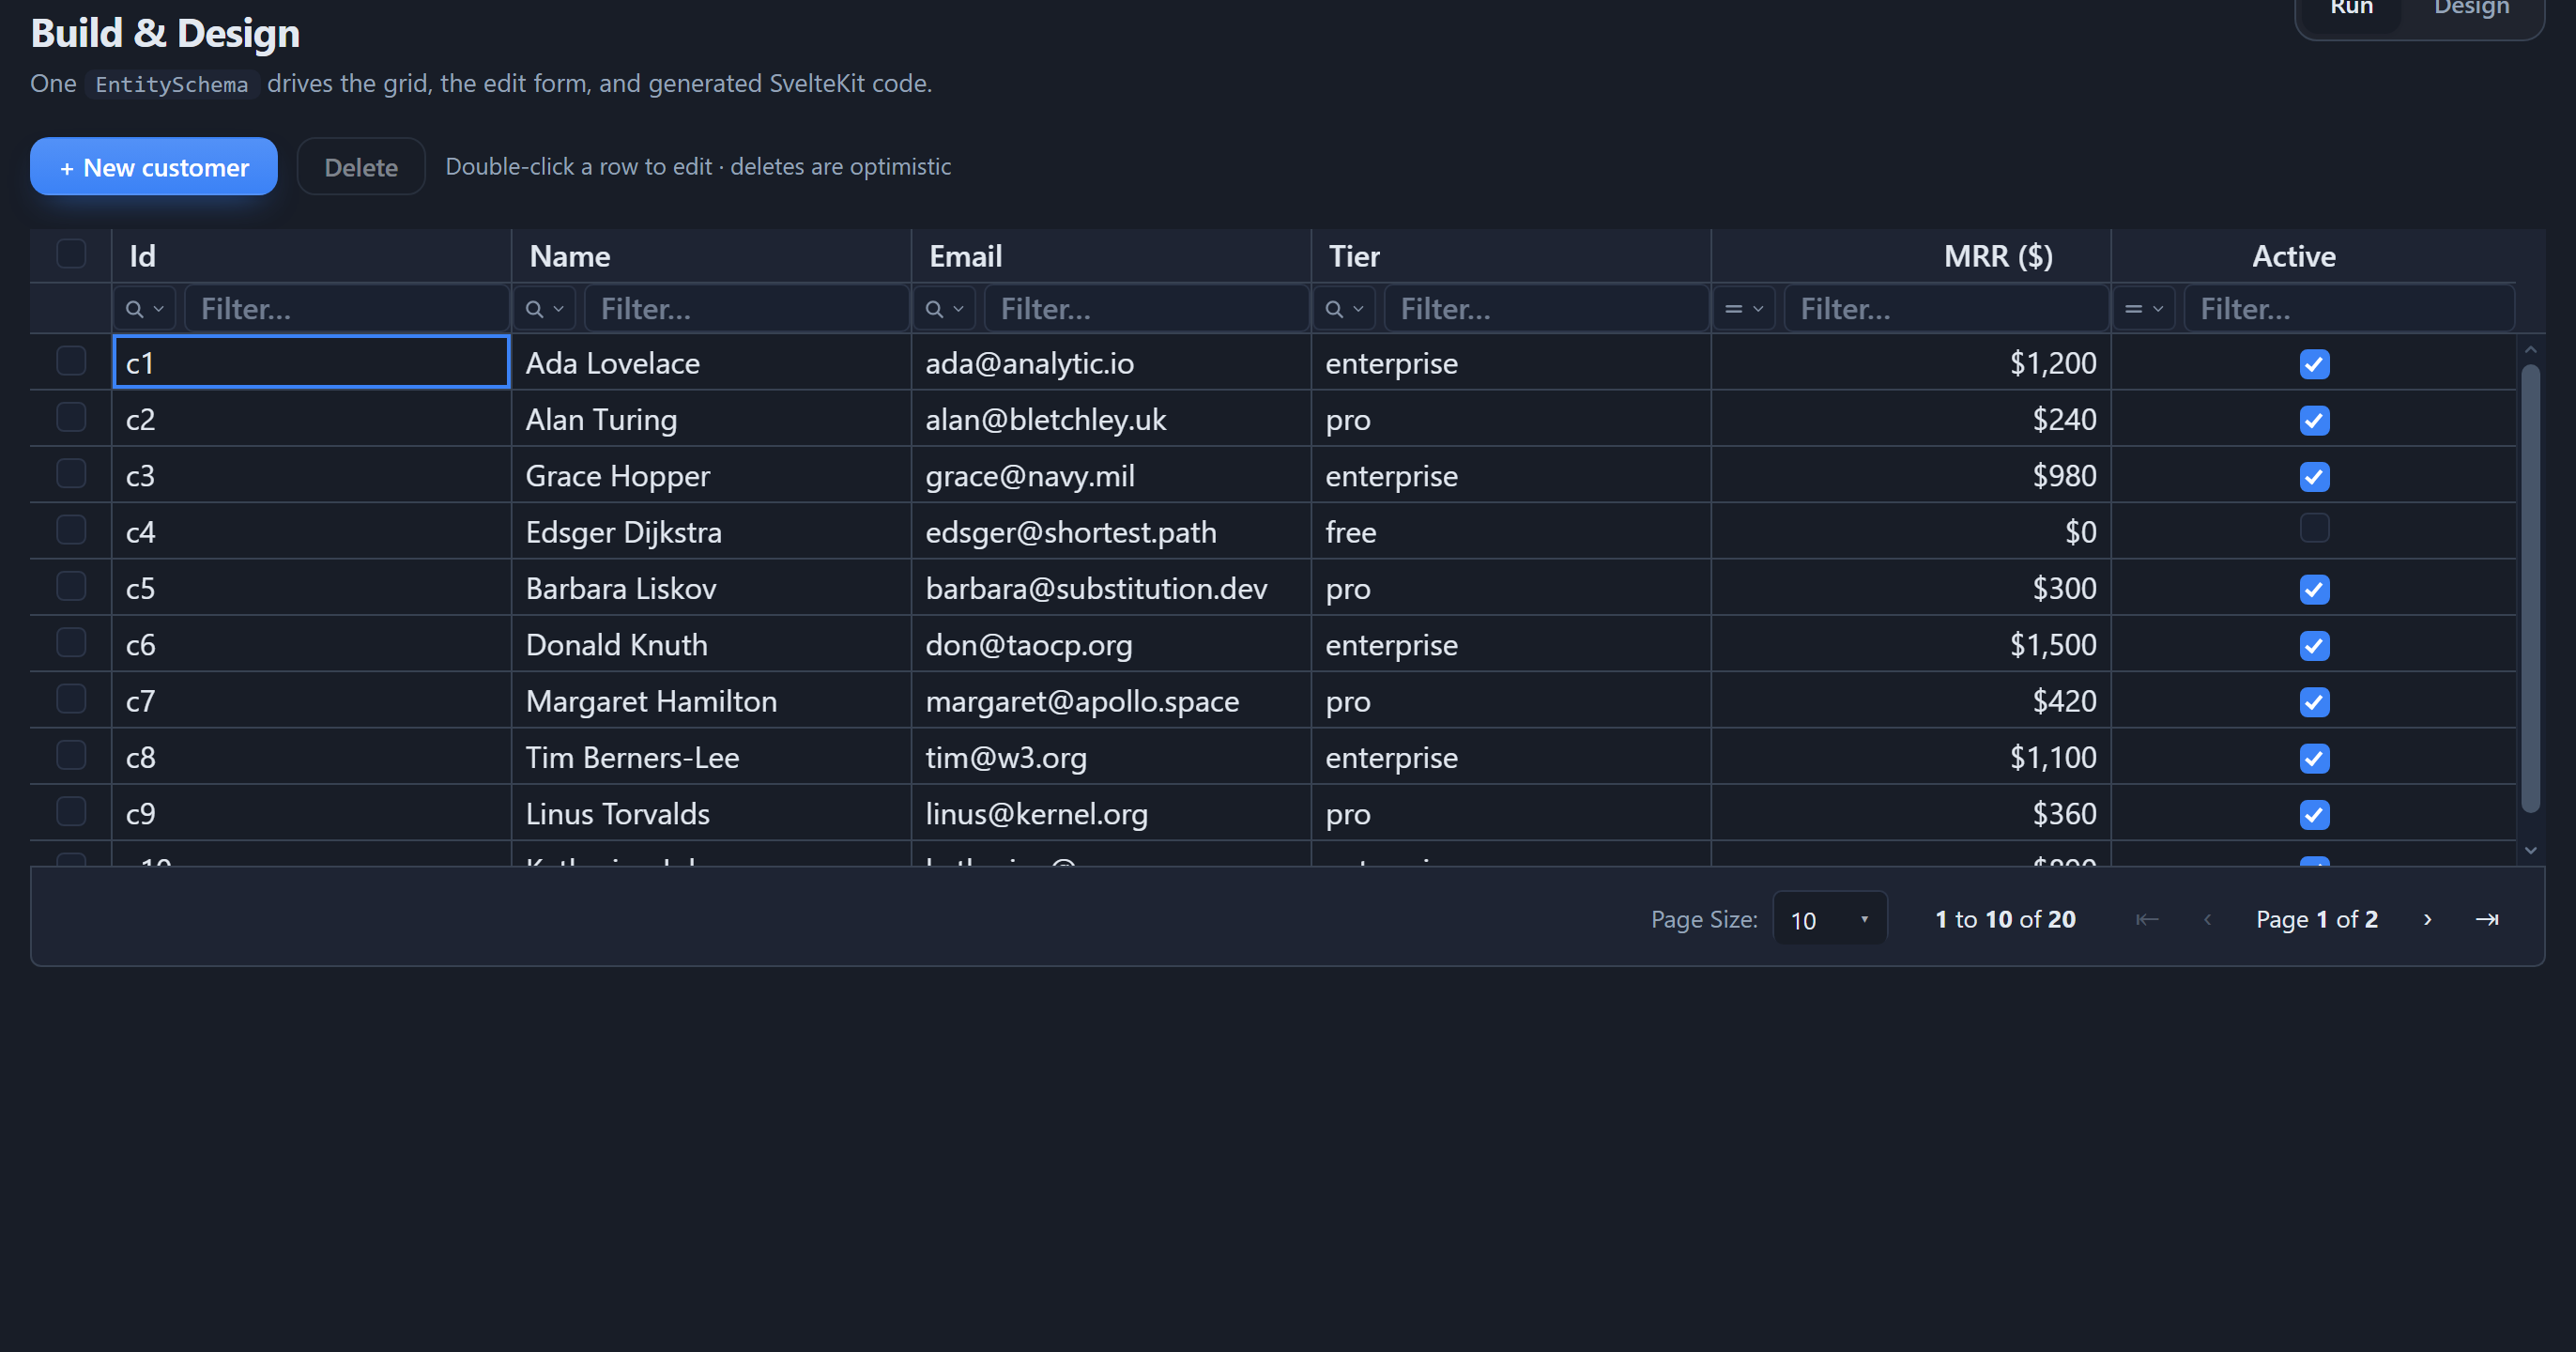
- Read - the grid loads a page of rows from Supabase. Click a header to sort; type in the filter row or the search box to filter - each is a query to Postgres, not a client-side pass.
- Create - + New customer opens a validated form. Fill it in and save; the new row is inserted and appears in the grid.
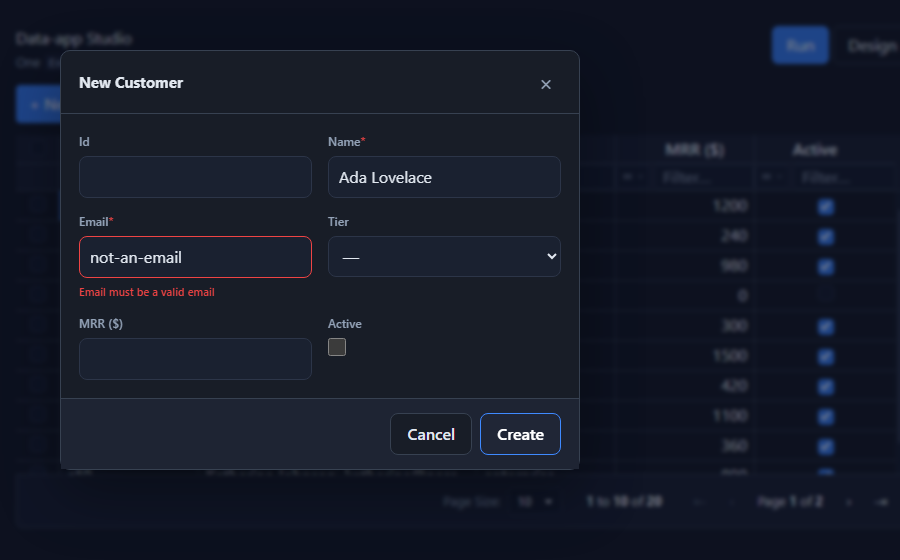
- Update - click a row to edit it in the same form. Saving patches that row in
Supabase; with
optimistic: truethe change shows instantly and rolls back if the write fails. - Delete - tick rows and Delete selected; each is removed from Supabase.
Paging is server-driven too - the footer shows the real total (1 to 10 of 240),
fetching one page at a time.
What made this work
- One schema described the table; the grid columns, the form, and validation all came from it.
- One line (
createSupabaseDataSource) turned Supabase into the grid's data source. Sorting, filtering, paging, and CRUD are pushed to Postgres. - RLS enforced access on every request, so the public anon key is safe.
Swap createSupabaseDataSource for a SQL, REST, or in-memory source and the page
is byte-for-byte identical - that is the ServerDataSource
contract.
Next steps
- Make it live - add
createSupabaseRealtimeso the grid flashes and refetches when the database changes, with no polling. - Secure it - put the screen behind a login and scope rows per user with Auth & Row-Level Security.
- Any table -
introspectSupabaseTable({ url, key, table })reads the columns (and foreign keys) into anEntitySchemafor you - see Supabase. - Skip the typing -
npx @svgrid/studio add customers --db supabase --url ...generates all four files above from your live table. See The Studio CLI.
See also
- Supabase - the full reference (both connection paths, troubleshooting)
- Data binding - the
ServerDataSourcecontract - Getting started - the same screen over in-memory data
- Databases - Postgres, MySQL, SQL Server, SQLite